Showing posts with label Recipe. Show all posts

Thursday, March 05, 2009

Recipe: Perfect Soft-Boiled Eggs


I used to think making soft boiled eggs were so difficult - in fact, I was so bad at making soft boiled eggs, I used to go all the way to Himawari Ramen in San Mateo just to get my fix of soft boiled eggs.

This is no longer the case!

We have been enjoying perfectly cooked soft-boiled eggs for a year or so now - and it is literally perfect each time as long as we follow this very simple recipe. The key is in the timing, so a timer is definitely a necessity.

Here is how it goes:

1. Place cold eggs in a pan or pot with apx 1 cm of cold water. Yup, that's right, the eggs will not be fully immersed in the water. One cm deep of water is plenty for this method. Put the lid on the pan/pot and don't take it off until the very last step.
2. Bring water to a boil on High Heat.
3. As soon as the water boils, turn heat down to Medium.
4. Cook at Medium Heat for 4 min.
5. Immediately after these 4 min, remove from heat and let eggs sit in hot water, 3 min.
6. Quickly chill eggs in cold water briefly to cool down the eggs for easy peeling.
7. Peel and enjoy!

I swear by this recipe. As long as the timing is followed carefully, the eggs come out extremely consistently. The decadent creaminess of the soft boiled yolk is beautifully maintained while the outside white is firm enough to contain the goodness.

Needless to say, I have not had those violent urges to head over to San Mateo in a while!

***The original recipe/idea was found in Japanese here. We shortened the cooking time to modify the recipe to soft-boiled eggs from hard-boiled eggs.

Thursday, February 26, 2009

Terms: Abura-age


Abura-age: Oil-fried.

The second word is a-ge, with e as in hem, not age as in the years you have been alive...

Anyway, it is interesting that the two words that literally translate to "oil-fried" always indicates fried tofu in Japanese. It's not like we don't deep fry other things, but if it's oil-fried, it's always tofu.

I have read that it is relatively easy to make abura-age at home, although I have yet to try it. It requires pressed out water from already firm tofu, flash frying once in high heat, followed by slow frying in lower heat. It sounds easy enough, but when perfectly good abura-age is so readily available in the JP grocery stores nearby, it's hard to get deep frying going at home.

The commercially bought abura-age can be a touch stale, although it comes back to life nicely by abura-nuki (oil-removal). It has a fancy term, but all it involves is either blanching the abura-age or washing their surfaces with boiling hot water. The deep frying process creates air pockets inside the tofu and with a little extra handling, abura-age fluffs up like comforters in the hot summer sun!

Once fluffed, these pillows are extremely versatile. It can be baked in the oven or stewed in soups. They can be enjoyed alone as is as slices of smaller pieces or it can be stuffed with all sorts of ingredients. I tend to fill them rather than use them alone. Some of the many things I have stuffed them with are natto, hijiki seaweed, cabbage, mushrooms of all kinds, barley, and a combination of many of these goodies. I have even dropped a raw egg inside the abura-age pocket and cooked the eggs in its pockets inside broth. These pockets can be tied with the dried Japanese root vegetable, kanpyo (more terms!), or simply closed with a tooth pick.

I stuffed mine today with left over udon noodles from dinner last night, which is something I learned at En, the new Izakaya that opened last month which serves a nice selection of oden. It had never occurred to me before to fill abura-age with anything but vegetables, but I liked the concept very much. The problem, though, was that it was like combining something relatively plain, flavor-wise (abura-age), with something more plain (udon). So I decided to add either kimchi or nori seaweed in the pockets alongside the udon for my version. These were then added to a line up of other hot-pot trimmings like vegetables and fish cakes and simmered in the broth for a few minutes.

I have to say - the upgraded flavor punches definitely made a big difference! In comparing the two pockets, the nori one definitely had better fragrance and a more delicate combination of scent and texture, but boy, the kimchi one was the winner for sure! It packed a kick of crunch that highlighted itself very nicely against the pillowy abura-age and the flavor-injected udon noodles!

Nori vs Kimchi Battle #1: Nori 0 - 1 Kimchi

Monday, February 23, 2009

Avocado Goodness

Since going 99% vegetarian last June, my vegetarian cooking repertoire has expanded quite a bit! I tend to cook with very Japanese ingredients, thanks in part to having two JP grocery stores within 5 min of my work place, but there are a few dishes that require nothing particularly difficult to obtain that I think is worth sharing here.

One came from my exploration of the avocado. When I started training harder for the upcoming marathon, I noticed a distinct absence of stamina from time to time. It wasn't that I was under-trained or tired, because my muscles were completely fine and my heart rate was totally stable. I attributed it to the lack of freely available energy - "the bonk" was happening sooner than I expected on some runs!

I realized that perhaps my diet had become too Buddhist Monk-ish, and since I was trying to run 20+ mi instead of meditating all day long, I just didn't have enough energy in my system. I turned to the avocado for a quick solution, and voila! It totally had a positive effect on my training regime! Now, I have three avocado menus that I have made multiple occasions to add an energy boost.

Avocado Goodness #1: Oven-baked Avocado "Katsu"


Katsu is a Japanified version of Cutlet. It's usually made with pork or chicken, but I made this with avocado and I didn't deep fry it like it's typically done. This is so simple, it doesn't even require a recipe, but here it is anyway:

1. Slice avocado to bite size pieces.
2. Soak/dip avocado in beaten eggs.
3. Coat egg-covered avocado in Japanese bread crumbs (panko).
4. Bake in a 450F preheated oven until golden. Turn if necessary.

I use a convection toaster oven and it takes about 20 min.

Avocado Goodness #2: Wakame-seaweed Salad with Avocado Dressing


Photo courtesy of my cooking buddy, Mrs. Chef.

This is another one I have made with many slight modifications. I basically mash avocados up with a bunch of different vegetables and season the whole thing with ponzu. And that's really it! I always add wakame seaweed and chopped cucumbers, but the other ingredients have varied quite a bit. The "microgreens" from Trader Joe's (which is basically a mix of various sprouts) was very good, as well as canned corn and anything else with a crunch.

Avocado Goodness #3: Avocado Miso Sauce


This is another one so simple, it requires no formal recipe...


All I do is mix avocados and miso at a ratio of 1 avocado to 1 tbs miso with a dash of milk and yuzu juice in the food processor. Literally. That's it. This sauce is great on most white foods that have body or density - boiled daikon radishes, potatoes, chicken, pork, etc. The smoothness of the creamy avocado is best showcased against the backdrop of some texture but in the absence of any competing personalities.

Drop me a note if you try any of these and let me know how it went!

Sunday, September 14, 2008

Root Vegetable Hamburg

In Japanese, patties used in burgers are called HAMBURG, vs the hamburgER which has the patty in between the bun. I am specifically calling this recipe the Root Vegetable Hamburg because I got the idea for it while flipping through a Japanese Macrobiotic cookbook from Rice Terrace Cafe, a Macrobiotic restaurant outside of Tokyo on its own farm.

The original recipe was for a Lotus Root Hamburg, and it only used lotus roots with various other odds-and-ends dry goods that we didn't have at home. Being new to this Macrobiotic thing, I am still in the process of updating my pantry with more Macrobiotic friendly staples. That didn't stop me from getting the idea to go ahead and make something similar, because the picture in the cookbook looked too good to not try.

I had read that root vegetables are favored in Macrobiotic cooking, so instead of limiting the main ingredient to lotus roots, I added Japanese taro (Sato-imo) and some carrots, which made the dish into a Root Vegetable Hamburg. Because both lotus root and Japanese taro are sticky, I didn't need to add any eggs or other binders, which gave me extra Macrobiotic points. (I have nothing against eggs, especially since they are one of the few animal products my body still accepts, but Macrobiotically, they are frequently kept off the list of ingredients whenever possible.)

I lose the same amount of points won by not using eggs because I continue to use fish-based broth (dashi) in my cooking, though. Again, because I am not allergic to broth of any kind, I still use bonito broth to cook almost everything, including pre-boiling the vegetables that will go into my "Macrobiotic" hmaburg. :P

I briefly considered experimenting by adding the oatmeal or the pressed barley that I got yesterday, during my Macrobioti-fication of my pantry, but since I was bringing these to a dinner party, I played it safe and used regular panko bread crumbs instead to give the patties a little bit more firmness. Next time, though, I will be more adventurous!

So here it goes:

1. Boil 1 bag (454g) of frozen lotus roots and sato-imo in dashi, seasoned with soy sauce and a touch of mirin.
2. When soft, puree, leaving some chunks.
3. Microwave and puree 6 oz carrots (optional; we made some with and some without)
4. Add a handful of panko bread crumbs to pureed root vegetables.
5. Finely chop shiso leaves (or basil) and add to the patty mixture.
6. Form patties.
7. Heat grapeseed oil in a pan.
8. Cook both sides until brown.
9. Serve with 1:1 mixture of tomato sauce and Japanese Worstershire sauce.

Seriously, these were super easy and super tasty. It can be made 100% vegetarian if the vegetables are boiled in vegetable or konbu broth.

Tuesday, February 05, 2008

Pork Roast: Strawberry-Cranberry Version

I know, I know, how many pork roasts can I make before I start turning into Wilbur...

I find myself cooking with pork a lot because it's a tad meatier than chicken and a whole lot easier to cook correctly than beef. It is as versatile as fish and a whole lot cheaper. It also keeps in the fridge much better than seafood - all the reasons for a busy girl like me to keep cooking with it for dinner...

Today's dinner was, yes, yet ANOTHER pork dish. But this one was equally good as the ones before, and I have to say, I was quite proud of my accomplishments when the Papa Bear proudly proclaimed that he thought the meat courses at The Dining Room with Ron (which I promise to post very soon) was not that impressive because what we had at home was just as good. Now, that is some serious flattery! Well done, Papa, well done!

Anyway, here is what we had tonight:

1. Mix 1 tsp of salt, 2 tbs of strawberry jam, 1 tbs of dried rosemary and 0.5 tbs of dried thyme.
2. Wash and dry pork tenderloin strips (1 lbs, maybe?).
3. Slather strawberry jam mixture on to one side of the pork tenderloin strips.
4. Cook in a skillet at high heat, non-jam-side first. Sear on high heat, 3 min or so, until browned. Reduce heat to medium, close lid, cook ~3 min.
5. Flip over and cook ~3 min or so with the lid closed. Turn heat up to high and cook 2 min or so.
6. Add 1/8 cup of water, add 1 tbs dried cranberries, and close lid. Cook until the pork reaches about 160F.
7. Take pork out and add 1.5 tbs ketchup. Mix with pan drippings/scraping.
8. Serve sauce over pork.

I made some blanched asparagus and sauteed spinach to go with the pork. Total cooking time? 15, 20 min for a satisfyingly yummy dinner!

Thursday, January 31, 2008

Pork Roast: Apple-Sauce Version

This is not really a roast. Actually, it's not a roast at all, but it's another pork recipe that can be adopted to be a roast recipe. I made it with bone-in pork chops, and it literally took me 10 minutes to have dinner on the table. It was so good that 10 min later, it was gone.

1. Cut a hole in the pork chop. This is to stuff some goods inside in the subsequent steps.
2. Mix applesauce and dried hot peppers, adding the peppers to your liking.
3. Stuff the pork chop with applesauce/pepper mixture.
4. Mix dried thyme, rosemary, and salt with mustard. I go heavy on the herbs (2 tsp per 1 tbs mustard) since mine are not very potent. I think I had about 1/2 tsp of salt.
5. Slather mustard mixture on one side of the pork.
6. Heat a skillet. When hot, put the pork in, mustard-side up. Turn down heat to med-high and cook 5 min or so. I cover my skillet here to speed up the cooking process.
7. Turn up heat back up to high and flip pork. Cook 3 more min or so.
8. Flip pork over again, add 1/2 cup of sake, close lid, turn down heat to medium and cook 5 min or so, until sake has evaporated.
9. Check that the pork has reached internal temperature of 160F or so and remove from skillet.
10. Add 2 tbs of ketchup and 1/4 cup of sake to the skillet, scrape any goodies off from the pan and blend into ketchup sauce. Serve pork with sauce.

I microwaved pre-cut broccoli and baby carrots while the pork was cooking. Since I hardly eat starches, I don't bother with rice, bread, etc, but the Papa Bear supplemented dinner with white rice.

The applesauce kept the pork very tender and the sauce complimented the sweet and spicy pork so incredibly well. I feel a tad awkward complimenting my own recipe, but this was a true winner. And the speed of it all? That's the best part!

Sunday, January 27, 2008

Dinner Parties: Mexican Night

Because I have had little motivation to go out to eat lately for caloric and economical reasons, I've been hosting a number of dinner get-togethers. Luckily, my friends have not complained having to eat at Izakaya Alice (yet), but I try to limit repeating menu items as often as possible. Besides our now standard Sushi Party, I've thrown traditional roast-poultry American, Americanized-Italian and Slightly Japanese-Mexican-themed dinner parties. Well... if we get really technical, all my cooking uses the Japanese elixir, dashi, for broth, so they all are slightly Japanified. Izakaya Alice is fusion at its core...

What I learned from throwing dinner parties is that the protocol for success is very much like what I do in the laboratory at work. If the party starts at 7 PM, I go to my whiteboard in the kitchen and start with this:

t=0 7 PM

time=0 indicates when the party starts; in other words, that's when all the prep work need to be completed. Then, I fill the rest of the menu items, so now my whiteboard looks like this:

Mango salsa
Salsa
Guacamole
Ground meat
Drum sticks
Taco veggies
Mexican Rice
Beans
Set up quesadilla bar & taco shells

t=0 7 PM

Finally, I add when I will need to start to have the dish/prep work done by t=0. I also order things so that things that can be made ahead are done first, so as to serve hot foods hot when at t=0.

5:00 PM Mango salsa
5:00 PM Salsa
5:00 PM Guacamole
6:20 PM Ground meat
6:00 PM Chicken drumsticks (oven, 6:30 PM)
5:45 PM Taco veggies
5:00 PM Mexican Rice (stove, 6:30 PM)
6:00 PM Beans
6:30 PM Set up quesadilla bar & taco shells

t=0 7 PM

I then get started with each task, referring back frequently to my whiteboard to plan a few steps ahead as I prepare dishes. I even actually check off items as they are completed. This organizational tedium has helped me throw parties with minimal time commitment and pressure. In fact, with my super dishwasher with its godzillion plate-load capacity, throwing a dinner party, start-to-finish, is leaps and bounds easier than going out to dinner in San Francisco!

Here are a few winners from the Mexican Dinner Party:

Izakaya-Alice Non-refried Beans:
Sautee 1 onion and 5 cloves of garlic. Puree sauteed stuff. Add 2 can canned beans to food processor, making separate batches if needed to fit into food processor. Puree beans with the onion-garlic mixture. Add dashi to thin if pureeing is difficult. When liquefied, put bean mixture into a pot and mix dashi to achieve desirable consistency. Add salt to taste.

Izakaya-Alice Guacamole:
Sautee 1 onion and 5 cloves of garlic. (I actually made a big batch of this onion-garlic mixture and used it in several recipes during the evening. This heating step is necessary for me, because I am allergic to raw onions and garlic. It's likely not necessary for anyone else, but heating it definitely brings the sweetness out of the onions.) Puree 2 avocados, 1/2 cup fat-free cottage cheese, and onion-garlic mixture together. Chop tomatoes and add to avocado mixture. Add salt and lime juice to taste.

Photo: compliments from Jumprdude.com. I have a contributing photographer now, so you will likely start seeing more pictures on MED again!

Thursday, January 24, 2008

Pork Roast: Mustard Version

I love the pork tenderloins they sell at Trader Joe's. The ones that are tubular in shape? They make great roasts that take about two seconds to prep and are great for a busy weeknight dinner. I dress the pork, throw it in the oven, go do something else for 15 min or so, come back to whip up a salad, microwave some more veggies, and voila! Dinner is served!

I have several different versions of the pork roast, but this one is what we are having for dinner tonight:

0. Turn oven on to 400F.

1. Cut pork tenderloin in the middle without slicing into two discrete pieces (just enough of a cut to allow goodies to be put in the middle).

2. Slather apricot jam/orange maramalade/or anything else like that in the middle.

3. Fold the pork closed and place in a roasting pan or Pyrex dish.

4. Mix:
1/4 cup mustard
1/4 cup bread crumbs
1.5 tbs toasted sesame seeds
1 tbs dried oregano
1 tsp salt
1 tsp pepper

5. Slather mustard mixture on top of the pork.

6. Bake, 400F, 25-30 min or until center portion reaches at least 160F.

Tuesday, January 22, 2008

Breakfast Treats: French Toast

Weekend breakfasts were always a treat I looked forward to in college and grad school. In fact, it was often the highlight of the weekend. Mo's Diner in Hartford, Eggs N' Things in Honolulu, and Elmo's Diner and Mama Dip's Kitchen in Chapel Hill - just seeing the names of these places bring a smile to my face. Standing in line for sometimes hours at a time, the wait was part of the fun too. Powered by the free-flowing coffee and giggles over the happenings of the night before, weekend breakfasts were really an integral ritual for me back then.

I've tried to recreate a breakfast ritual here in San Jose too, but I guess times have changed. No one calls me at 10 AM to wake me up to go to breakfast anymore - instead, I am up by 8 AM, either furiously finishing up my work from the night before or heading out for a long run or my pick-up rugby game. In place of the gossip from the night before are talks of what to make for dinner and which grocery store I need to go before the crowd gets there too. But once in a while, I crave that breakfast scent of cinnamon and nutmeg, eggs and batter, and pots after pots of coffee. And when I felt that way this weekend, I opened up the fridge to find all the necessary ingredients for one of my favorites from those days waiting in line for the perfect start of the day...

French Toast:
2 eggs
1/4 cup Vanilla Soy Milk
A healthy amount of nutmeg (fresh ground is sooo much better!)
A generous portion of cinammon

Trader Joe's Sprouted Whole Wheat Bread (this was key for the aboslutely wonderful nutty flavor and chewy texture.)

Beat eggs well and add remaining ingredients. Soak bread in batter thoroughly. Spray heated skillet with canola oil (I tried it without any oil at first and the bread lost its nice egg layer...). Cook on one side until the face-up side starts to look less wet. Flip, cook about the same amount of time (I like my French Toast mostly dry with just a touch of wetness left in the middle).

I ate my French Toast with a kiwi-mango-papaya fruit salad, which was very satisfyingly good, despite my missing the rest of breakfast ritual...

Monday, January 21, 2008

Wa-saucy!

OK, OK, so the title was a really bad play on words...

I am a big fan of making sauces of all sorts. It is actually what I love the most about cooking - mixing different ingredients to see what comes out at the end. I match different textures, flavors, and scents, while imagining what the sauce will do to the saucee - the saucee being the object of affection with which the sauce will be consumed. It is truly one of my favorite things to do in the kitchen.

It is a misconception that sauces need to be high in fat to be creamy. I used to buy into the mayonnaise-as-base fundamentals of making creamy sauces. I recently learned that Fat-Free European-style yogurt works better than mayonnaise with 1/3 of the calorie. I basically substitute yogurt for all my mayo-based sauces and dips now.

Here's one my stand-bys. This is great with steamed vegetables or other crudites.

1 tbs wasabi from a tube
1 tsp soba/udon sauce (I have this as a home-made sauce, frozen; however this can be bought in bottles at most grocery stores these days.)
3 tbs yogurt (I go fat-free, and it's plenty creamy)

Mix well.

And that's it! This is great as a dipping sauce, but it can also be used as salad dressing. As salad dressing, though, the wasabi might be ultra-potent, so I'd go a bit easy on the wasabi. This is also great with grilled scallops; it can even work with grilled chicken if you add a touch more salt to it.

It's so easy, I almost feel silly writing it. But I am hoping that this blog can help The Papa Bear gain independence in the kitchen, which means I must write down even the most simplest of recipes...

Monday, May 28, 2007

Izakaya Alice: Late night soups

This entire holiday weekend, we've sort of been off-schedule at the Bear Family household. The Papa Bear doesn't get up before 10 AM unless prodded, and the Baby Bear has been catching up on her celebrity gossip in the morning hours while the Papa Bear is sleeping away. The problem with starting the day late is that our hunger level is off-schedule...

For example, we had a huuuuuuge lunch-inner at 3 PM in San Francisco on Sunday (a somewhat non-memorable tapas place, except for the fact that the owner was SUPPPPPER nice). This made us not hungry until... 10 PM? Who wants to cook a major dinner at 10 PM? Surely not this Baby Bear.

Luckily, we had some ground chicken and eggs - which is all I need in addition to my usual pantry items (which is probably worth a post of its own - the Japanese staples entry!). I threw together an Izakaya Alice specialty - 10 min dishes that is satisfying enough to be a menu item on the Izakaya Alice line-up:

Chicken-tsukune soup:

1. Make tsukune (chicken meatballs) by combining and massaging together 1 lbs ground chicken, 2 eggs, 1 tbp (eye-balled) ponzu, a bunch of sesame seeds, and enough panko (JP bread curmbs) to give it enough consistency to make balls.

2. Make dashi enough to act as soup (~1.5 cups per person is more than enough; and yes, yes, I will do a dashi post when I have enough energy... You see, it's because I keep thinking the dashi post will be best with pictures and pictures take a long time to process...><). Flavor dashi with soy sauce for a touch of saltiness.

3. Add tsukune balls to dashi. I am so lazy, I don't bother making the balls. I scoop some of the tsukune material and drop it directly into the soup. It looks like an ellipical blob, but it works just fine. No mess!

4. Cook until all tsukune balls float (about 5-8 min). Chop one in half just to make sure it's cooked in the middle.

5. Add dried wakame (the kind that expands) and turn off heat. While you get all of the dishes ready for plating the soup and setting the table, the wakame will be ready!

6. I served the entire pot on the table with some grated yamaimo to top the soup (yamaimo also deserves a post of its own - my current obsession!). Add ponzu as desired while eating the soup!

This was sooooo super satisfying and it took literally 15-20 min to make. It was the epitome of Izakaya Alice - quick, healthy, and satisfying!

Wednesday, May 23, 2007

Artichokes, Koo-style

I didn't get to describe in detail some of the deliciousness I experienced recently at Koo (San Francisco) with The Gourmand and Yamo, but there were three dishes in particular that I was really excited about. These three dishes, I have since then replicated at home with moderate success. Today's post is just a quick recipe post:

Koo-inspired artichokes...

1. Fill pressure cooker with 1 cup of katsuo-dashi (bonito broth, which I keep promising to share my recipe... I promise, I promise!)
2. Throw in artichokes to the pressure cooker (my pressure cooker fits 4)
3. Cook on high heat until the pressure cooker starts to make that pressure-cooking noise.
4. Turn heat to low and cook 2 min.
5. Turn off pressure cooker heat and let pressure come back to normal.
6. In the mean time, make the dipping sauce.

Dipping Sauce:
1. Heat extra-virgin olive oil and sautee a handful of chopped garlic cloves.
2. Once the garlic is fragrant, add salt and generous amounts of dried rosemary, thyme, oregano, and sage.
3. Turn off heat and let oil cool.
4. Add vinegar, mirin, and more salt (if needed) to taste until a slightly tangy, subtly sweet, fragrant taste is acheived.

In Koo's version, the artichokes were soaked in the sauce, but I decided to season it with a dipping sauce. It's less messy at home because your fingers don't get sticky with the sauce, since you're just dipping the tips of the artichoke leaves. If you don't have garlic allergies like I do (I can't eat raw garlic - it makes me throw up), this sauce can probably be made without sauteeing the garlic, but the frying gave it a really nice toasty scent.

Monday, March 06, 2006

How to host your own sushi party

Today's post is the most recipe-oriented post I have ever done. This recipe sheet was part of the Menu for Hope sushi kit. I've hosted a number of sushi parties over the years, and it's a lot of fun. It can get messy, but who doesn't love audience-participation these days? Supplement the party with beauty competitions for the best looking work, best tasting or most original combination of ingredients, fastest rolling times, and you've got an active bunch of dinner guests for sure!

INGREDIENTS:

Sushi vinegar for 3 cups of rice
1/3 cups vinegar (preferably rice vinegar, but anything not sweet will do)
2 tsp salt
1 tsp sugar
3 cups of rice per 3 ~ 4 people
2 lbs total various fish per 3 ~ 4 people
Anything else that you might want to roll - cheese, vegetables, etc, etc
Seaweed sheets
Wasabi
Soy sauce
Sesame seeds (optional & not-traditional)

RICE PREP:


1. Cook rice according to package (I'm no help here, since I just use my rice cooker!).
2. Per 3 cups of rice, make sushi by heating 1/3 cup vinegar, 2 tsp sugar, 1 tsp salt until all crystals dissolve.
3. When rice is done, dump rice out onto a deep and large casserole dish/brownie pan (or anything that you can spread the rice out on - bowls will not do).
4. With a wet shamoji or spatula, spread the rice with a cutting motion so that it's not one big mound, using care not to mash the rice. The key here is to use a cutting motion with the shamoji.
5. Pour sushi vinegar all over the rice and mix with a cutting motion. While mixing, FAN vigorously. Fanning makes the rice shiny and less wet as the vinegar coats the grains. Continue motion, approximately 5 min.
6. Clump rice into one side and cover with a wet paper towel.

MAKI SUSHI ROLLING:


Maki sushi refers to the rolled sushi pieces. The standard Japanese sushi roll has the seaweed on the outside. These are the easiest ones to make! Keep a bowl of water hand to dip your hands or your shamoji.

1. Use a piece of seaweed about 8 inches by 3.5 inches.
2. Dip your shamoji or hands in water and place approximately a 1/4 cup of cooked rice.
3. Spread rice over the seaweed using your hands or the shamoji. Sprinkle sesame seeds if desired all over the rice.
4. Put goodies to be rolled inside, 1/3 of the way on the seaweed closer to you.
5. Fold the seaweed away from you slightly, cover the seaweed piece not touching the rice, and press the mat by closing your hands into a light fist around the mat to adjust the shape.
6. Open the mat and repeat process after rolling the seaweed a little bit further. The edge of the mat will always be at the rolling edge of the seaweed sheet, right next to where the rice makes contact with the rolling edge.
7. Remove the mat when you have rolled all the way.
8. Slice if needed and enjoy!

*To make an inside-out roll, wrap the sushi mat with saran wrap first and follow steps 1 - 3. Flip the seaweed sheet over on the sushi mat so that the rice is touching the saran wrap. Follow steps 4-8.

NIGIRI SUSHI:


Nigiri sushi is the poster child of sushi. With pieces of fish (or other goodies) on top and elliptical balls on rice on the bottom, these are easy to make if you remember to keep your hands moist without being wet. If your hands are too dry, the rice will stick all over your hands and if you hands are too wet, the rice will crumble as you try to shape it.

1. With moist hands, take approximately 3 tbs of rice.
2. Shape into an elliptical ball.
3. Slather on some wasabi to the bottom side of whatever you were going to place on top.
4. Place the top piece.
5. Cup your left hand to hold the bottom of the rice and use your index and middle fingers on the right hand to make the top and bottom pieces firmly fit together. Use caution here, since if you press to firmly, you'll have a mushy ball of rice.
6. If desired, give the sushi a thin seaweed belt going vertically to unite the top piece with the bottom piece.

GUNKAN SUSHI:


Gunkan, which literally translates to 'battle ship', is the method used to make sushi out of loose, crumbly, or soft pieces of ingredients that are not fit to be nigiri sushi. Traditional examples are fish roe and sea urchin, but I found goat cheese to be a very enjoyable gunkan sushi in the past. Boiled crab is also excellent as a gunkan topping.

1. Follow steps 1 and 2 of nigiri sushi.
2. Cut a piece of seaweed sheet to be 1/4 taller than your rice ball and just long enough to overlap ever so slightly when wrapped around the sushi.
3. Wrap rice with seaweed.
4. Load the empty top compartment with whatever ingredients and enjoy!

SOME FUN INGREDIENTS:


Zuke ('marinated') tuna:

Mix 1/8 cup soy sauce and 1/8 cup sake. Marinate 0.5 lbs fresh sashimi-grade tuna for 10 min. Use in rolls.

Spicy tuna:
Marinate fresh sashimi-grade tuna in any hot sauce for ~2 hrs. Use in rolls.

Spicy cream cheese:
Mash up a few hot peppers into cream cheese. Serve rolled with cucumbers or asparagus.

SOME MORE REFERENCES
Japanesefood.about.com
My fusion sushi

PS:

I was planning on having one for a long time now to supplement this entry with pictures, but alas, I have been too busy... Maybe I will update this page as I find time...

Wednesday, December 14, 2005

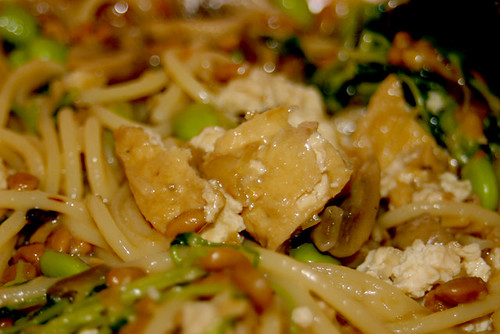
Fusing Spaghetti Natto Style

I've been doing some wacky things with spaghetti recently. Spaghetti in my kitchen is no longer Italian or even American. It's ...borderless. Fusion to the max.

On the coat tails of the successful curry spaghetti (which is now a standard dish in my dinner rotation), I've been exploring different kinds of sauces. My most recent victory was the Natto Spaghetti.

natto
Oh my goodness, this was so amazing. I am salivating looking at this picture right now.

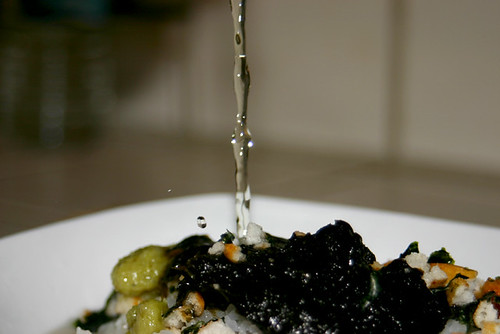
I've already confessed my love for natto, but never in a million years did I expect it to match spaghetti so much. The slimy coating on the spaghetti only highlighted its delicious smooth texture. Each noodle was slick and seductively oozing with natto essence. Dashi-steamed/boiled edamame, fried tofu, and pea sprouts added more substance and refreshing change in mouth-feel.

This was so good and so unbelievably simple, I have to do a recipe-type description.

Goods:
1. Bring just a little bit of bonito broth to boil (the instant stuff is fine, or substitute with broth of your choice), seasoned relatively strongly with soy sauce.
2. Add chopped fried tofu and edamame to steam/cook ~5 min (depending on how soft you like your edamame), amking sure 95% of the liquid is gone.
3. Add pea sprouts just before the spaghetti is done.

Spaghetti:
Boil spaghetti for it to finish just as the edamame is soft. Strain just before adding to stirred natto.

Natto:
Stir, stir, stir until your arm is about to fall off in a big bowl.

Assembly:
1. Add cooked spaghetti to stirred natto, stir to coat spaghetti.
2. Add all of the solids from the Goods section and tiny bit of remaining sauce to the bowl with natto and spaghetti.
3. Serve and enjoy!

The longest time-sink is the time it takes for the water to boil for the spaghetti. After that, this meal is ready in 15 min or less. And goodness, it packed all the right flavors and all the right textures. Two thumbs up for natto!

Thursday, October 20, 2005

SHF: Home-made Men's Pocky

I pondered and pondered as to what I should make for this SHF: The Dark Side. I have been a fan of Kelli's Lovescool for so long, I wanted to make something that would show my respect for her and her inspirational blog. She was also one of my lovely judges during the last DMBLGIT competition, so I wanted to participate with a really nice dish as a show of appreciation for her time...

The problem was that I am not a very big fan of chocolate. I appreciate a dose of good chocolate here and there, but in all honesty, I don't crave it and I don't lust after it like I drool over some of the equally sinful savory treats and alcoholic drinks. I'd rather drink the same calories than eat decadent desserts - so I have a fairly limited repoire of chocolates treats to share... I brainstormed for all kinds of chocolate treats I would want to eat - which didn't produce a very long list. Since I always try to add a little touch of Japan (or at least Asia) when I participate in these events, I decided to go with something uniquely Japanese that had chocolate as a main player...

pockey
Home-made POCKY!

More specifically, these are called Men's Pocky in Japan, since they have a dark chocolate coating. For some odd reason, dark chocolate (or anything with subdued sweetness) in Japan is considered either manly or adult - hence, the dark chocolate versions of Pocky are called Men's Pocky...

Pocky is a national favorite in Japan. Ask any Japanese person and they will know what Pocky is. The familiar red box evokes childhood memories in almost anyone who spent any time growing up in Japan. The ubiquitous treats are found in convenience stores around the country, at kiosks at public transportation hubs, brought to field trips, and even served at bars in place of popcorn and peanuts. There is a wide range of Pocky-derivatives, such as those with strawberry chocolate (my favorite), green tea chocolate, crushed nuts with white chocolate to all other variations produced through Japanese creativity. The makers of Pocky, Glico, often bring out 'seasonal Pocky' too, which have boxes and flavors that are unique to the changing seasons in Japan - like the Sakura (Cherry Blossom) Pocky.

Making my homemade Pocky was so easy, I'm amazed I'd never done it before. My Pocky ended up about five times the width of regular Pocky, but I bet I could get them thinner next time. There was sesame in my biscuit, since I just used frozen dough from a previous SHF dish (yes, it was 4 months old... but it was frozen!).

Although my Pocky wasn't quite the same as the boxed Pocky, it definitely had the Pocky spirit. I don't know if I were to serve this to Pocky aficionados, they would recognize it as their favorite treat... I'd definitely do it again as an easy snack for potlucks and dinner parties, since they are very photogenic, cute little chocolate sticks!

Recipe:
Sesame tart pastry was sliced into thin strips, rolled into tubes, and baked until golden (in my oven, 400F for 10 min, but my oven is so messed-up, I have no idea what the real temperature is). Once the strips were cool, I poured microwave-melted dark chocolate on them and let them cool on saran wrap. Once the chocolate solidified, Pocky easily came off the saran wrap.

Sunday, October 09, 2005

Paper Chef: Vietnamese Autumn Rolls

I'm finally getting my life back in order after an insane month that left me longing to be a housewife somewhere other than Japan (or at least trying to), and to kick off my rebirth, I had a few friends over for dinner tonight to try a creative twist of an old favorite - Vietnamese Summer Rolls.

As I've written before, these fresh, salad-based wraps are sometimes known as Spring rolls, Summer rolls, or Fresh rolls. One thing they are never known as are Autumn rolls. So, when Stephen of Stephen Cooks suggested that we all make an Autumn-themed dish with duck, pears, nut butter, and ginger for the most recent Paper Chef event, it was only natural for me to try to make Vietnamese Autumn rolls. I used the Paper Chef excuse to cook up something I wouldn't do normally - like roasting a whole duck.

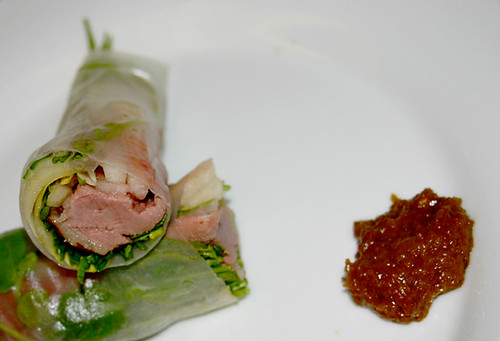
autumn roll
My Paper Chef entry is my take of the Vietnamese rolls as a Autumn version with duck as the meat with pears, endives and watercress as the 'herbs'. My dipping sauce was a soy nut butter-ginger-pear-duck broth dipping sauce instead of the simple peanut sauce.

One thing I'm not that good at doing is knowing what vegetables and what fruits are best at which season. Of course I know strawberries are good in the Spring, tomatoes in the Summer, and hard and/or root vegetables in the Fall, but this seasonality thing is something I am still learning. In my defense, I know all about the seasonality of Japanese fruits, but many of those aren't available here!

Anyway, a quick Google search told me that endives and watercress were in peak season in Autumn, so I went with endives and watercress as my 'Autumn herbs'. But living in the Bay Area, where tomatoes are still ruling the Farmer's Market stalls, I didn't see any of either. I found them in Whole Foods, but that means nothing in terms of seasonality. I hope they qualify as Autumn herbs!

After running around for the whole morning, I started in the kitchen by getting my duck marinade together:


2 cups sake
2 cups soy sauce
1 cup orange juice (squeezed from real oranges - I have them frozen from orange season)
1/4 cup hoisin sauce
1/4 cup plum sauce (found in Asian grocery stores - kind of like a lemonish/plum jelly)
1/8 cup pomegranate molasses
3 lobes grated ginger

Although measurements are approximate, I whisked all of these things together and made sure it was savory-sweet. I then washed and wiped my whole duck and let it soak in the marinade bath for maybe an hour.

In the mean time, I made the sauce:

I washed and boiled the neck and gizzards from the duck, taking away all that yucky stuff that float up - this duck broth was going to be the basis of my dipping sauce today. The combination of the dipping sauce and the salad roll is really what defines these Vietnamese rolls, and I thought that the sauce being made with the same duck 'essence' was the best way to make sure the rolls have the best accompaniment.

While the duck broth was in progress, I grated a humongous multi-lobed ginger (maybe five lobes?) and a peeled pear for the dipping sauce. I didn't know a pear could be so easily grated, but grating the pear released all of the juices very nicely while giving the sauce that necessary consistency. When the duck broth stopped producing all the yucky stuff, I let it simmer for a while (maybe 30 min? I lost track of time crocheting my turtle, inspired by Super Eggplant's Florence. Yes, you will see my turtle when he is fully born...).

I added the ginger and the pear into the duck broth when I could peel myself away from my crocheting project and let it simmer some more. I added some hoisin sauce and soy butter (my nut butter choice) into the duck broth and whisked it together. I probably added about 1/4 cup each, but this is totally a personal choice - please put in as much or as little of either ingredient to make a duck-powered soy nut sauce. This is very, very similar to the peanut sauces that frequently come with Summer rolls in restaurants, except a little thicker (because of the pear and ginger both) and spicier (because of the ginger).

With the sauce finished, I went to roast the duck:
I stuffed the inside of the duck with a pear and an apple (the apple was a generous freebie from the pear vendor at the Farmer's Market today!). I roasted the duck in my oven (which has really no accurate temperature control) with various settings, but I wouldn't trust anything I say about the temperature control. I've come to understand my oven by using my hand as a temperature gauge, so I roasted it until the outside was crispy and the inside moist. It took about another hour or so when it was all said and done.

Assembly of the final product was easy:

I washed the endives and the watercress, and just in time, Anne and the Papa Bear walked in to help me slice and dice the duck after its post-roasting 'resting period'. I peeled and chopped up another pear into thin slivers to wrap inside along with the endives and the watercress.

Final step was wrapping! I wrapped one just to take pictures of it by rolling the endives, watercress, pear slivers, and duck into the rice paper. I sliced the roll in half just for the photo shot and dabbed some soy nut butter-ginger-pear-duck broth dipping sauce on the side.

For the actual dinner, Shan joined the three of us for a wrap-it-yourself feast of Autumn rolls:

And I've got to say - this was a good combination! A success! The spiciness of the watercress inside the roll and the ginger in the dipping sauce complimented the duck very well. The sweetness from the pears, the duck itself, and the dipping sauce gave the spiciness a nicely balanced contrast. The crunchiness of the pears and the endives made the overall effect of the rolls quite refreshing despite the richness from the duck.

I also made a pumpkin-shiitake mushroom couscous (material for another post) to go with the Harvest theme and served the whole meal with a Pumpkin Ale for those of us who imbibe (two out of four).

It was a nice evening with a breeze of Autumn on a Sunday night. Thanks for a wonderful opportunity to get creative, Stephen!

PS: The Papa Bear says, "What the heck is Vietnamese about this dish?!". Ha.

Sunday, August 07, 2005

Paper Chef: Kalbi-Gone-Local

It's been SOOOO long since I actually had the time and mental stability to tackle something in the kitchen, and this month's Paper Chef event had the perfect theme to go along my NoCal LoCal challenge (OK, was that a really lame, dorky title that shouldn't have been repeated?!)! Thanks for going local, Owen!

The challenge was to use (dried) chili peppers, peaches, edible flowers, and another local ingredient to concoct something tasty. I thought and thought and thought about this one, so much that I actually came up with a total of four dishes I could've made. Since it's been 100F+ around where I live, I briefly considered doing something like a hot and sweet peach sauce to go over ice cream. I quickly decided that I just wasn't hungry for anything sweet right now. I then played around with the idea of a peach salsa, but then I remembered that I didn't really like fruity salsa that much... I was just about to start making a turkey-peach meat ball (like chicken-apple sausage) to go inside dumplings, when I came up with a better idea. What better way to combat the heat than having some tasty, local-powered, home-grilled KALBI?!

yakiniku3
I'm proud to say that all the produce I used tonight came either from the local farmers or from our very own (planter box) garden!!

The following produce were purchased from my favorite organic and/or all-natural (uncertified organic) farms at the Pleasanton Farmer's Market:

- garlic (my chosen local ingredient #1)
- lettuce (my chosen local ingredient #2)
- white peaches
- basil with flowers (ours is recovering from a recent harvest)

From our very own planter boxes came:

- mint (my chosen local ingredient #3)
- chili peppers (ours is so hot, it's made many grown men cry.)

The short ribs came from the meat department at Whole Foods, who serves a wide variety of cuts, all hormone- and antibiotic-free (the only kind of meat I really feel good about eating). Unfortunately, although my soy sauce is organic and my sake is junmai (pure-rice, none of that industrial alcohol in my sake!), both of them were purchased at one of the big Asian grocery stores...

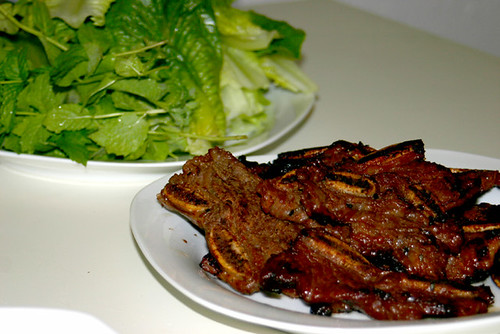
yakiniku2
I made the marinade with crushed garlic and peaches, sake, soy sauce, roasted sesame seeds, and our very own chili peppers from our planter boxes (I substituted fresh peppers for dried ones). I saved some of the marinade to use as dipping sauce later, then dumped the meat in the marinade. Periodically, I massaged and kneaded the beef in the marinade to make sure the marinade soaked into the meat well. A couple hours later, on the hot grill they went (thanks, Papa Bear!), and a short while later, voila! My Paper Chef entry was done!

yakiniku1
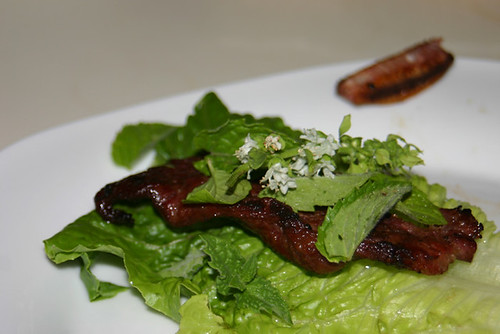
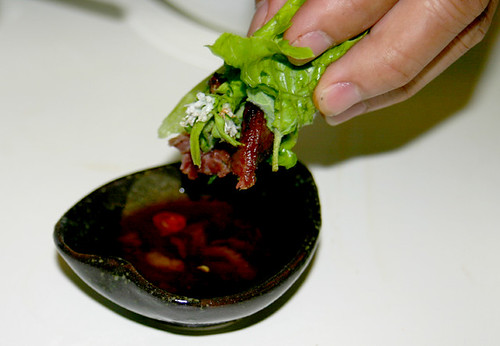
Although I had some kimchee to go with it, for the first bite of my Kalbi-Gone-Local, I wrapped the meat in lettuce along with my home-grown mints (home-grown from seeds for the first time!!!) and the basil flower, the only edible flower that could be found in the Pleasanton Farmer's Market. The marinade had that natural sweetness of juicy peaches with the kick of our extra-hot peppers, and the refreshing herbal notes of the mint and the basil cut the oil of the short ribs. I don't think I would've ever thought to make a Kalbi marinade with white peaches if it weren't for the Paper Chef theme, so this was a very worthwhile and fun culinary adventure for me!

Thanks for the inspiration and the wonderful ingredient list, Owen!

PS:
I'd leave you with a better recipe, except everything was eye balled. Here's a very approximate list for the marinade...

1 cup sake
1/2 ~ 3/4 cup soy sauce (to taste, should be salty-sweet)
3 garlic cloves, crushed
1 large white peach, cored and crushed
3 tbs toasted sesame seeds

Mix, use as dipping sauce or meat marinade. Enjoy!

Sunday, July 31, 2005

IMBB: TasteTea Ochazuke

This month's Is My Blog Burning theme, hosted by Clement over at A La Cuisine! is TasteTea - any dishes made with tea.

I mulled over this one for several days. I thought about my matcha agar blocks, but that was already a previous IMBB dish. I considered making some other green tea dessert, but I'm not really in a sweet phase right now and didn't find dessert dishes to be too appealing. I played around with the idea of going online and finding a recipe for tea-smoked chicken, but didn't feel like making anything elaborate this weekend...

During my recipe search, I came across a rice salad made by cooking wild rice in tea, and I had a light bulb moment. I'd been eating a tea-less version of a tea dish all my life, and I just hadn't thought of it as a tea dish, even though smack in its Japanese name is the word for tea - OCHAzuke - Japanese tea porridge!

Ochazuke, which literally translates to Tea Soaked, is a rice dish that I've had on a very, very regular basis since I was old enough to boil water. Most of the time, I use left over rice and a 'ochazuke package', which has dried tea/broth (I don't know for sure if it's broth or tea powder...) and the trimmings, consisting of rice crackers and seaweed. There can be some kind of additional flavoring in these in the form of dehydrated wasabi, ume plum, or salmon too. All I have to do is pour the packet over microwaved rice and reconstitute it with boiling hot water. The powder has some tea-colorings, although I have never noticed a tea flavor in it...

The most recent 91st issue (yes, there really is 91 issues, published bi-annually...) of my epicurean bible, Oishinbo, had a whole chapter dedicated to the art of Ochazuke, and if you look really, really closely at this tiny picture on Amazon.co.jp, you'll notice that it is Ochazuke on the cover. I've never made this dish from scratch using real tea, so this will be an adventure, perfect for the IMBB occasion!

I started by making the seaweed (nori) preserve (tsukudani) that goes on top (recipes are at the end). This is also the main seasoning. I crushed some rice crackers from Trader Joe's since something crunchy is absolutely key to this dish, but there is no way I can find those perfectly round Ochazuke rice crackers last minute around here. I knew I was OK with wasabi, since my mother sent me a life time supply of wasabi-in-a-tube a while back. I then had a panic moment when I couldn't find my stash of rice-popped sencha (toasted green tea - perfect bitterness to go with the umami-powered seaweed preserve), needed for the dish. Luckily, Anne had just come back from Boston and brought me some of tea from her favorite tea shop (any guesses? this is going to be a feature of its own, so I won't spill details here), and one of the tea she gave me was sencha. Lucky, lucky.

ochazuke
Once the tea was brewed and the rice was cooked, I piled some seaweed preserve, wasabi, and rice crackers, followed by a generous pouring of hot sencha. Done.

I'd share with you some pictures of the finished product, but alas, this dish needs to be consumed as soon as it is finished to be enjoyed properly... There was no time to be wasted for photo ops! This is such a simple dish, but it turned out to be quite satisfying. Most unbelievably, the bitterness of the sencha was totally gone, blanketed by the intense umami sensation of the seaweed preserve and the potent sting of the wasabi. That being said, the bitterness of the tea definitely contributed to the overall effect of the dish as a nice undertone and there is no way this dish can be made with boiling water instead of hot tea.

My seaweed preserve turned out very well, and had I known that I could make it so easily, I would've made it for my grandfather who is no longer with us. Seaweed preserve is sort of like jam here, where it's entirely possible and relatively easy to make at home, but because jarred versions can be so readily purchased, most people just buy it at the store. My grandfather loved this stuff, and always kept various jars in his fridge. Here's one for Ji-chan!!

Recipe:
Seaweed Preserve (nori no tsukudani)
5 sheet nori (seaweed like the one used for sushi)
2 cups sake in 1/2 cup increments
1/2-1 cup soy sauce
1/4 cup mirin (Japanese sweet rice wine)
1/8 cup Toasted sesame seeds

1. Tear up all the nori into approximately 2 inch x 2 inch pieces
2. Pour first 1/2 cup sake into a small pan on high heat
3. Add nori and cook until almost all of the sake is absorbed
4. Repeat until 1 1/2 cups of sake is almost all absorbed
5. Add soy sauce, mirin, and sesame seeds
6. Add last 1/2 cup of sake
7. Cook until all of the liquid is absorbed and the seaweed has a very thick consistency.
8. Keep in an air tight container in the fridge.

Ochazuke:
1. Build the Ochazuke from top to bottom with rice, seaweed preserve, wasabi(or ume plum paste) to taste, and 1 tbs small bits of crackers. More seaweed preserve, wasabi or ume paste can be added later, so I recommend starting with less. For 1/2 cup cooked rice, I'd go with 2 tbs seaweed preserve and 1 tsp wasabi paste, 1/4 tsp ume paste.
2. Pour hot sencha tea, brewed strong.
3. Enjoy right away after mixing with your spoon!

Thursday, June 16, 2005

SHF: Summer-y Left-Over Tart

I'm feeling a little run down and unimaginative these days... Let's see how (un)imaginative I can be with this month's Sugar High Friday, hosted by Life in Flow, a fellow biologist with an interest in the culinary arts...

Today, I'm attempting to make a tart with all the left over goods around the kitchen. I have a mango that is as ripe as the Papa Bear (gracefully aged) and oranges rescued after one of its fellow residents in the bag succumbed to a serious case of mold. I also have a jar of soy bean jam from Kyoto begging to be finished off... I think a jello-y orange-mango terrine (like at Payard) would be nice in a soy jam-sesame crust for a summer-themed tart...

I found out that tarts and pies are different only by the pans used. I don't have a tart pan. And I don't want to buy a tart pan. So... I am going to use Trader Joe's Creme Brulee container, which will give me a straight edge crust (ha! a crust that doesn't drink or do drugs!) instead of a slanted crust, which should qualify this creation as a tart.

OK, so the crust. I like the sweet tart crust we used to use at the bakery at Weaver Street Market in NC, so I found a basic sweet tart crust recipe here and will be modifying as such:

1 cup whole wheat flour
1/8 cup sesame
1/8 tsp salt
1/4 cup butter
1/8 cup brown sugar

1/8 cup soy bean jam (estimated, I just added the water into the jar...)
1 egg yolk
1/4 cup water

1. Mix flour, sesame, and salt
2. Cut in butter
3. Mix jam, yolk, and water, slowly add to flour mixture
4. Roll out and freeze, ~ 1hr
5. Fit dough into mold
6. Bake, 400F 10 min

MANGO:
1. Slice mangos and layer on top of baked shells, brush on honey
2. Layer on top of baked shell
3. Bake 400F 10 min

ORANGE:
1. Squeeze 1/2 cup worth of orange juice
2. Add 1/2 tbs of gelatin and let stand 10 min
3. Boil, cool to egg white consistency, and pour over mangos
4. Cool pie -oh, I mean, tart - in the frige overnight.

Serve tart with fresh mint:

shf1

This turned out so well and very much like the Payard terrine that I went back to take another picture. The mango-orange combination and the consisitency was right on target.

shf2

The mint really added a herb-y freshness. The sesame in the crust made an equally bold statement, which I enjoyed very much. I think from now on, I will add sesame to all my pie crusts with sesame-compatible innards. I didn't taste the soy jam much, but there wasn't a whole lot left in the jar.

Over all, a pretty decent spur of the moment creation, esp. considering I started it last night at 10:30 PM... but not good enough to drag me out of this unimaginative, tired feeling... I'm usually a very positive spirit, but lately, I can't seem to shake that feeling of 'blah'.

What I really need is a good weekend. I had a rough week, including news of my proposal getting rejected from funding - it was a REALLY good idea, so I am sad about it. Luckily, my boss thinks it's a good enough idea to find alternate funding sources for it, but it still makes me blah. Coming back to CA from the East Coast always makes me a little bit homesick for the familiarity for where I grew up - the East Coast is so very different from CA and I miss the landscape, the architecture, the people, the attitude... and most of all, my friends. I'm just feeling blah these days - which upon reflection is really for no major reason. I think I just need a good, fun weekend.

Anyone have any great ideas for a blow-out fun weekend to beat the blues?

Sunday, May 22, 2005

IMBB: Wafuu (Japanese-style) Green Tea Parfait

Remember how I was telling you about the Japanese obsession with parfaits? The summer is parfait season in Japan with practically every cafe doing some sort of a 'Parfait Fair', featuring gorgeous glasses filled with ice cream, jello, syrups, and sugary goodness. Ice creams and parfaits rule Japan in the summer, and a recent report from my favorite Japanese blogger in Japan shows us how much more advanced the Haagen-datz in Japan is compared to the simple scoop-shops we have here in the US. Ice cream kaiseki! Amazing.

So when I saw this month's IMBB theme, "Has my blog jelled?", hosted by Elise over at Simply Recipes, I knew exactly what I was going to make. Nothing like a cool, refreshing jello/jelly/kanten parfait treat on a hot summer day! Green tea kanten jello parfait!

"Kanten?", you might ask... Kanten is agar, and agar is a seaweed-based coagulant. And yes, biologists. We eat that stuff in Japan. (For non-biologists, we, in the lab, use agar as a solid surface to grow all kinds of bacteria. It's usually mixed with yeast extract, and the stuff smells B-A-D, especially after we've grown some funky E.coli on them...) Agar itself has very little smell and hardly any detectable taste, which is why it is so great to work with in the kitchen!

IMBB1

When I was back in Japan, I came home with some very nice high-quality kanten. Unlike the blocks one gets in the stores around here, my kanten was in fine threads. And it took a lot more work to prepare than the regular kanten, starting with a 8 hr soak in water!

Once the kanten (5 g) was ready, I cooked it in 1 cup of water over low heat for 15 min or so. I saw little chunks of kanten undissolved, and I probably should've followed the traditional method and strained it at this point, but I didn't. Oh well. It added an interesting texture to the final product!

While the kanten was simmering, I made extra strong green tea with my trusted cha-sen, a beater used ONLY for green tea. You see, it's all about specialization in Japanese utensils - a cup to measure rice and only rice, a beater to make tea and only tea... I combined 1 cup of the green tea with 1 cup of the kanten mixture, and let it solidify in the refrigerator for several hours.

Then, the fun part! Assembly!

IMBB2
Since I still have some wonderful wasambon hand-crafted artisan sugar, I knew my sweetener was going to be kinako-sugar powder. Kinako is to soy beans as cocoa powder is to cacao beans. Kinako is a delicate powder full of condensed soy bean taste with a tender nuttiness (as in nut-like, not crazy). With the wasambon sugar, the combination is an airy, heavenly sweetness, rarely found in any other treat.

I cubed the jello and layered kinako-sugar powder, and topped the parfait with soy milk ice cream to match the kinako soy theme. Ice cream is an obligatory component of any Japanese parfait, and voila! A home-made Wafuu (Japanese-style) Green Tea Parfait!
IMBB3


Materials:

Kanten mixture:
5 g kanten
1 cup water

Green tea:
2 tbs green tea powder
1 cup water

Kinako-wasambon:
1/4 cup kinako
1/4 wasambon

Soy milk ice cream

PS:
Yes, this is the same jello I made for my Kyoto-inspired dinner!

PS2:
Here's a link to the round-up!