Showing posts with label Simple Dinners. Show all posts

Thursday, February 26, 2009

Terms: Abura-age


Abura-age: Oil-fried.

The second word is a-ge, with e as in hem, not age as in the years you have been alive...

Anyway, it is interesting that the two words that literally translate to "oil-fried" always indicates fried tofu in Japanese. It's not like we don't deep fry other things, but if it's oil-fried, it's always tofu.

I have read that it is relatively easy to make abura-age at home, although I have yet to try it. It requires pressed out water from already firm tofu, flash frying once in high heat, followed by slow frying in lower heat. It sounds easy enough, but when perfectly good abura-age is so readily available in the JP grocery stores nearby, it's hard to get deep frying going at home.

The commercially bought abura-age can be a touch stale, although it comes back to life nicely by abura-nuki (oil-removal). It has a fancy term, but all it involves is either blanching the abura-age or washing their surfaces with boiling hot water. The deep frying process creates air pockets inside the tofu and with a little extra handling, abura-age fluffs up like comforters in the hot summer sun!

Once fluffed, these pillows are extremely versatile. It can be baked in the oven or stewed in soups. They can be enjoyed alone as is as slices of smaller pieces or it can be stuffed with all sorts of ingredients. I tend to fill them rather than use them alone. Some of the many things I have stuffed them with are natto, hijiki seaweed, cabbage, mushrooms of all kinds, barley, and a combination of many of these goodies. I have even dropped a raw egg inside the abura-age pocket and cooked the eggs in its pockets inside broth. These pockets can be tied with the dried Japanese root vegetable, kanpyo (more terms!), or simply closed with a tooth pick.

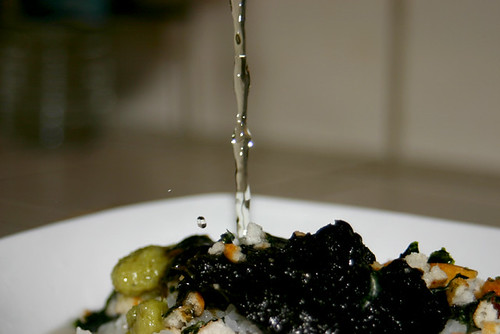
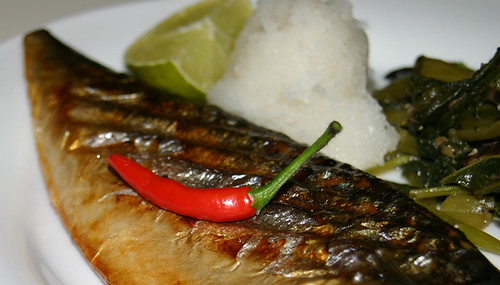
I stuffed mine today with left over udon noodles from dinner last night, which is something I learned at En, the new Izakaya that opened last month which serves a nice selection of oden. It had never occurred to me before to fill abura-age with anything but vegetables, but I liked the concept very much. The problem, though, was that it was like combining something relatively plain, flavor-wise (abura-age), with something more plain (udon). So I decided to add either kimchi or nori seaweed in the pockets alongside the udon for my version. These were then added to a line up of other hot-pot trimmings like vegetables and fish cakes and simmered in the broth for a few minutes.

I have to say - the upgraded flavor punches definitely made a big difference! In comparing the two pockets, the nori one definitely had better fragrance and a more delicate combination of scent and texture, but boy, the kimchi one was the winner for sure! It packed a kick of crunch that highlighted itself very nicely against the pillowy abura-age and the flavor-injected udon noodles!

Nori vs Kimchi Battle #1: Nori 0 - 1 Kimchi

Monday, February 23, 2009

Avocado Goodness

Since going 99% vegetarian last June, my vegetarian cooking repertoire has expanded quite a bit! I tend to cook with very Japanese ingredients, thanks in part to having two JP grocery stores within 5 min of my work place, but there are a few dishes that require nothing particularly difficult to obtain that I think is worth sharing here.

One came from my exploration of the avocado. When I started training harder for the upcoming marathon, I noticed a distinct absence of stamina from time to time. It wasn't that I was under-trained or tired, because my muscles were completely fine and my heart rate was totally stable. I attributed it to the lack of freely available energy - "the bonk" was happening sooner than I expected on some runs!

I realized that perhaps my diet had become too Buddhist Monk-ish, and since I was trying to run 20+ mi instead of meditating all day long, I just didn't have enough energy in my system. I turned to the avocado for a quick solution, and voila! It totally had a positive effect on my training regime! Now, I have three avocado menus that I have made multiple occasions to add an energy boost.

Avocado Goodness #1: Oven-baked Avocado "Katsu"


Katsu is a Japanified version of Cutlet. It's usually made with pork or chicken, but I made this with avocado and I didn't deep fry it like it's typically done. This is so simple, it doesn't even require a recipe, but here it is anyway:

1. Slice avocado to bite size pieces.
2. Soak/dip avocado in beaten eggs.
3. Coat egg-covered avocado in Japanese bread crumbs (panko).
4. Bake in a 450F preheated oven until golden. Turn if necessary.

I use a convection toaster oven and it takes about 20 min.

Avocado Goodness #2: Wakame-seaweed Salad with Avocado Dressing


Photo courtesy of my cooking buddy, Mrs. Chef.

This is another one I have made with many slight modifications. I basically mash avocados up with a bunch of different vegetables and season the whole thing with ponzu. And that's really it! I always add wakame seaweed and chopped cucumbers, but the other ingredients have varied quite a bit. The "microgreens" from Trader Joe's (which is basically a mix of various sprouts) was very good, as well as canned corn and anything else with a crunch.

Avocado Goodness #3: Avocado Miso Sauce


This is another one so simple, it requires no formal recipe...


All I do is mix avocados and miso at a ratio of 1 avocado to 1 tbs miso with a dash of milk and yuzu juice in the food processor. Literally. That's it. This sauce is great on most white foods that have body or density - boiled daikon radishes, potatoes, chicken, pork, etc. The smoothness of the creamy avocado is best showcased against the backdrop of some texture but in the absence of any competing personalities.

Drop me a note if you try any of these and let me know how it went!

Tuesday, February 05, 2008

Pork Roast: Strawberry-Cranberry Version

I know, I know, how many pork roasts can I make before I start turning into Wilbur...

I find myself cooking with pork a lot because it's a tad meatier than chicken and a whole lot easier to cook correctly than beef. It is as versatile as fish and a whole lot cheaper. It also keeps in the fridge much better than seafood - all the reasons for a busy girl like me to keep cooking with it for dinner...

Today's dinner was, yes, yet ANOTHER pork dish. But this one was equally good as the ones before, and I have to say, I was quite proud of my accomplishments when the Papa Bear proudly proclaimed that he thought the meat courses at The Dining Room with Ron (which I promise to post very soon) was not that impressive because what we had at home was just as good. Now, that is some serious flattery! Well done, Papa, well done!

Anyway, here is what we had tonight:

1. Mix 1 tsp of salt, 2 tbs of strawberry jam, 1 tbs of dried rosemary and 0.5 tbs of dried thyme.
2. Wash and dry pork tenderloin strips (1 lbs, maybe?).
3. Slather strawberry jam mixture on to one side of the pork tenderloin strips.
4. Cook in a skillet at high heat, non-jam-side first. Sear on high heat, 3 min or so, until browned. Reduce heat to medium, close lid, cook ~3 min.
5. Flip over and cook ~3 min or so with the lid closed. Turn heat up to high and cook 2 min or so.
6. Add 1/8 cup of water, add 1 tbs dried cranberries, and close lid. Cook until the pork reaches about 160F.
7. Take pork out and add 1.5 tbs ketchup. Mix with pan drippings/scraping.
8. Serve sauce over pork.

I made some blanched asparagus and sauteed spinach to go with the pork. Total cooking time? 15, 20 min for a satisfyingly yummy dinner!

Thursday, January 31, 2008

Pork Roast: Apple-Sauce Version

This is not really a roast. Actually, it's not a roast at all, but it's another pork recipe that can be adopted to be a roast recipe. I made it with bone-in pork chops, and it literally took me 10 minutes to have dinner on the table. It was so good that 10 min later, it was gone.

1. Cut a hole in the pork chop. This is to stuff some goods inside in the subsequent steps.
2. Mix applesauce and dried hot peppers, adding the peppers to your liking.
3. Stuff the pork chop with applesauce/pepper mixture.
4. Mix dried thyme, rosemary, and salt with mustard. I go heavy on the herbs (2 tsp per 1 tbs mustard) since mine are not very potent. I think I had about 1/2 tsp of salt.
5. Slather mustard mixture on one side of the pork.
6. Heat a skillet. When hot, put the pork in, mustard-side up. Turn down heat to med-high and cook 5 min or so. I cover my skillet here to speed up the cooking process.
7. Turn up heat back up to high and flip pork. Cook 3 more min or so.
8. Flip pork over again, add 1/2 cup of sake, close lid, turn down heat to medium and cook 5 min or so, until sake has evaporated.
9. Check that the pork has reached internal temperature of 160F or so and remove from skillet.
10. Add 2 tbs of ketchup and 1/4 cup of sake to the skillet, scrape any goodies off from the pan and blend into ketchup sauce. Serve pork with sauce.

I microwaved pre-cut broccoli and baby carrots while the pork was cooking. Since I hardly eat starches, I don't bother with rice, bread, etc, but the Papa Bear supplemented dinner with white rice.

The applesauce kept the pork very tender and the sauce complimented the sweet and spicy pork so incredibly well. I feel a tad awkward complimenting my own recipe, but this was a true winner. And the speed of it all? That's the best part!

Thursday, January 24, 2008

Pork Roast: Mustard Version

I love the pork tenderloins they sell at Trader Joe's. The ones that are tubular in shape? They make great roasts that take about two seconds to prep and are great for a busy weeknight dinner. I dress the pork, throw it in the oven, go do something else for 15 min or so, come back to whip up a salad, microwave some more veggies, and voila! Dinner is served!

I have several different versions of the pork roast, but this one is what we are having for dinner tonight:

0. Turn oven on to 400F.

1. Cut pork tenderloin in the middle without slicing into two discrete pieces (just enough of a cut to allow goodies to be put in the middle).

2. Slather apricot jam/orange maramalade/or anything else like that in the middle.

3. Fold the pork closed and place in a roasting pan or Pyrex dish.

4. Mix:
1/4 cup mustard
1/4 cup bread crumbs
1.5 tbs toasted sesame seeds
1 tbs dried oregano
1 tsp salt
1 tsp pepper

5. Slather mustard mixture on top of the pork.

6. Bake, 400F, 25-30 min or until center portion reaches at least 160F.

Friday, August 25, 2006

My dinner tonight

I am taking the time tonight to relax at home and make something good to eat!

Here's what I have planned:

1. grilled bittermelon "boat", filled with natto-kimchi
2. stuffed trout with edamame-miso
3. wine-steamed clams with chilli-garlic-soy sauce

I actually made #2 and #3 before. They were quite good, if I say so myself, the first time around. I hope this will all work out. I got the idea for #1 from a food manga (comic), so it'll be an adventure.

It's been so long since I cooked a real meal with any creativity. When did I get so busy????

I hope I still have it in me to make something good! Restaurant Alice used to be the best place to eat in Dublin, CA. I hope it still holds true!

Wednesday, December 14, 2005

Fusing Spaghetti Natto Style

I've been doing some wacky things with spaghetti recently. Spaghetti in my kitchen is no longer Italian or even American. It's ...borderless. Fusion to the max.

On the coat tails of the successful curry spaghetti (which is now a standard dish in my dinner rotation), I've been exploring different kinds of sauces. My most recent victory was the Natto Spaghetti.

natto
Oh my goodness, this was so amazing. I am salivating looking at this picture right now.

I've already confessed my love for natto, but never in a million years did I expect it to match spaghetti so much. The slimy coating on the spaghetti only highlighted its delicious smooth texture. Each noodle was slick and seductively oozing with natto essence. Dashi-steamed/boiled edamame, fried tofu, and pea sprouts added more substance and refreshing change in mouth-feel.

This was so good and so unbelievably simple, I have to do a recipe-type description.

Goods:
1. Bring just a little bit of bonito broth to boil (the instant stuff is fine, or substitute with broth of your choice), seasoned relatively strongly with soy sauce.
2. Add chopped fried tofu and edamame to steam/cook ~5 min (depending on how soft you like your edamame), amking sure 95% of the liquid is gone.
3. Add pea sprouts just before the spaghetti is done.

Spaghetti:
Boil spaghetti for it to finish just as the edamame is soft. Strain just before adding to stirred natto.

Natto:
Stir, stir, stir until your arm is about to fall off in a big bowl.

Assembly:
1. Add cooked spaghetti to stirred natto, stir to coat spaghetti.
2. Add all of the solids from the Goods section and tiny bit of remaining sauce to the bowl with natto and spaghetti.
3. Serve and enjoy!

The longest time-sink is the time it takes for the water to boil for the spaghetti. After that, this meal is ready in 15 min or less. And goodness, it packed all the right flavors and all the right textures. Two thumbs up for natto!

Sunday, August 07, 2005

Paper Chef: Kalbi-Gone-Local

It's been SOOOO long since I actually had the time and mental stability to tackle something in the kitchen, and this month's Paper Chef event had the perfect theme to go along my NoCal LoCal challenge (OK, was that a really lame, dorky title that shouldn't have been repeated?!)! Thanks for going local, Owen!

The challenge was to use (dried) chili peppers, peaches, edible flowers, and another local ingredient to concoct something tasty. I thought and thought and thought about this one, so much that I actually came up with a total of four dishes I could've made. Since it's been 100F+ around where I live, I briefly considered doing something like a hot and sweet peach sauce to go over ice cream. I quickly decided that I just wasn't hungry for anything sweet right now. I then played around with the idea of a peach salsa, but then I remembered that I didn't really like fruity salsa that much... I was just about to start making a turkey-peach meat ball (like chicken-apple sausage) to go inside dumplings, when I came up with a better idea. What better way to combat the heat than having some tasty, local-powered, home-grilled KALBI?!

yakiniku3
I'm proud to say that all the produce I used tonight came either from the local farmers or from our very own (planter box) garden!!

The following produce were purchased from my favorite organic and/or all-natural (uncertified organic) farms at the Pleasanton Farmer's Market:

- garlic (my chosen local ingredient #1)
- lettuce (my chosen local ingredient #2)
- white peaches
- basil with flowers (ours is recovering from a recent harvest)

From our very own planter boxes came:

- mint (my chosen local ingredient #3)
- chili peppers (ours is so hot, it's made many grown men cry.)

The short ribs came from the meat department at Whole Foods, who serves a wide variety of cuts, all hormone- and antibiotic-free (the only kind of meat I really feel good about eating). Unfortunately, although my soy sauce is organic and my sake is junmai (pure-rice, none of that industrial alcohol in my sake!), both of them were purchased at one of the big Asian grocery stores...

yakiniku2
I made the marinade with crushed garlic and peaches, sake, soy sauce, roasted sesame seeds, and our very own chili peppers from our planter boxes (I substituted fresh peppers for dried ones). I saved some of the marinade to use as dipping sauce later, then dumped the meat in the marinade. Periodically, I massaged and kneaded the beef in the marinade to make sure the marinade soaked into the meat well. A couple hours later, on the hot grill they went (thanks, Papa Bear!), and a short while later, voila! My Paper Chef entry was done!

yakiniku1
Although I had some kimchee to go with it, for the first bite of my Kalbi-Gone-Local, I wrapped the meat in lettuce along with my home-grown mints (home-grown from seeds for the first time!!!) and the basil flower, the only edible flower that could be found in the Pleasanton Farmer's Market. The marinade had that natural sweetness of juicy peaches with the kick of our extra-hot peppers, and the refreshing herbal notes of the mint and the basil cut the oil of the short ribs. I don't think I would've ever thought to make a Kalbi marinade with white peaches if it weren't for the Paper Chef theme, so this was a very worthwhile and fun culinary adventure for me!

Thanks for the inspiration and the wonderful ingredient list, Owen!

PS:
I'd leave you with a better recipe, except everything was eye balled. Here's a very approximate list for the marinade...

1 cup sake
1/2 ~ 3/4 cup soy sauce (to taste, should be salty-sweet)
3 garlic cloves, crushed
1 large white peach, cored and crushed
3 tbs toasted sesame seeds

Mix, use as dipping sauce or meat marinade. Enjoy!

Sunday, July 31, 2005

IMBB: TasteTea Ochazuke

This month's Is My Blog Burning theme, hosted by Clement over at A La Cuisine! is TasteTea - any dishes made with tea.

I mulled over this one for several days. I thought about my matcha agar blocks, but that was already a previous IMBB dish. I considered making some other green tea dessert, but I'm not really in a sweet phase right now and didn't find dessert dishes to be too appealing. I played around with the idea of going online and finding a recipe for tea-smoked chicken, but didn't feel like making anything elaborate this weekend...

During my recipe search, I came across a rice salad made by cooking wild rice in tea, and I had a light bulb moment. I'd been eating a tea-less version of a tea dish all my life, and I just hadn't thought of it as a tea dish, even though smack in its Japanese name is the word for tea - OCHAzuke - Japanese tea porridge!

Ochazuke, which literally translates to Tea Soaked, is a rice dish that I've had on a very, very regular basis since I was old enough to boil water. Most of the time, I use left over rice and a 'ochazuke package', which has dried tea/broth (I don't know for sure if it's broth or tea powder...) and the trimmings, consisting of rice crackers and seaweed. There can be some kind of additional flavoring in these in the form of dehydrated wasabi, ume plum, or salmon too. All I have to do is pour the packet over microwaved rice and reconstitute it with boiling hot water. The powder has some tea-colorings, although I have never noticed a tea flavor in it...

The most recent 91st issue (yes, there really is 91 issues, published bi-annually...) of my epicurean bible, Oishinbo, had a whole chapter dedicated to the art of Ochazuke, and if you look really, really closely at this tiny picture on Amazon.co.jp, you'll notice that it is Ochazuke on the cover. I've never made this dish from scratch using real tea, so this will be an adventure, perfect for the IMBB occasion!

I started by making the seaweed (nori) preserve (tsukudani) that goes on top (recipes are at the end). This is also the main seasoning. I crushed some rice crackers from Trader Joe's since something crunchy is absolutely key to this dish, but there is no way I can find those perfectly round Ochazuke rice crackers last minute around here. I knew I was OK with wasabi, since my mother sent me a life time supply of wasabi-in-a-tube a while back. I then had a panic moment when I couldn't find my stash of rice-popped sencha (toasted green tea - perfect bitterness to go with the umami-powered seaweed preserve), needed for the dish. Luckily, Anne had just come back from Boston and brought me some of tea from her favorite tea shop (any guesses? this is going to be a feature of its own, so I won't spill details here), and one of the tea she gave me was sencha. Lucky, lucky.

ochazuke
Once the tea was brewed and the rice was cooked, I piled some seaweed preserve, wasabi, and rice crackers, followed by a generous pouring of hot sencha. Done.

I'd share with you some pictures of the finished product, but alas, this dish needs to be consumed as soon as it is finished to be enjoyed properly... There was no time to be wasted for photo ops! This is such a simple dish, but it turned out to be quite satisfying. Most unbelievably, the bitterness of the sencha was totally gone, blanketed by the intense umami sensation of the seaweed preserve and the potent sting of the wasabi. That being said, the bitterness of the tea definitely contributed to the overall effect of the dish as a nice undertone and there is no way this dish can be made with boiling water instead of hot tea.

My seaweed preserve turned out very well, and had I known that I could make it so easily, I would've made it for my grandfather who is no longer with us. Seaweed preserve is sort of like jam here, where it's entirely possible and relatively easy to make at home, but because jarred versions can be so readily purchased, most people just buy it at the store. My grandfather loved this stuff, and always kept various jars in his fridge. Here's one for Ji-chan!!

Recipe:
Seaweed Preserve (nori no tsukudani)
5 sheet nori (seaweed like the one used for sushi)
2 cups sake in 1/2 cup increments
1/2-1 cup soy sauce
1/4 cup mirin (Japanese sweet rice wine)
1/8 cup Toasted sesame seeds

1. Tear up all the nori into approximately 2 inch x 2 inch pieces
2. Pour first 1/2 cup sake into a small pan on high heat
3. Add nori and cook until almost all of the sake is absorbed
4. Repeat until 1 1/2 cups of sake is almost all absorbed
5. Add soy sauce, mirin, and sesame seeds
6. Add last 1/2 cup of sake
7. Cook until all of the liquid is absorbed and the seaweed has a very thick consistency.
8. Keep in an air tight container in the fridge.

Ochazuke:
1. Build the Ochazuke from top to bottom with rice, seaweed preserve, wasabi(or ume plum paste) to taste, and 1 tbs small bits of crackers. More seaweed preserve, wasabi or ume paste can be added later, so I recommend starting with less. For 1/2 cup cooked rice, I'd go with 2 tbs seaweed preserve and 1 tsp wasabi paste, 1/4 tsp ume paste.
2. Pour hot sencha tea, brewed strong.
3. Enjoy right away after mixing with your spoon!

Tuesday, July 26, 2005

Saba-Weekday style for the Doc

This one is for Dr. Biggles... His call for (quick) weekday meals was perfect for me, since I've had a hectic week at work already, and it's only Tuesday. I feel my energy to cook and eat zapped by my recent workload and work stress... Sigh.

Anyway, Doc, I sincerely appreciated your help with my mid-week rib problem, so when you asked for a week-day recipe, I knew I had to contribute.

This one is oh-so-easy, I feel almost guilty posting it as any kind of entry... But we Japanese believe that bringing out the best in the ingredient can be done with the simplest of preparation methods. And this one really takes that concept to the extreme...

saba
Saba, otherwise known as mackerel, is a staple for me. When in doubt, go for a saba dinner. I mean, seriously, this is so easy, even the Papa Bear can handle it by himself - so much that he made it for Anne when I was away (and then saved her left-over saba skin to eat later - eeeeewwe, again!!).

Here's the recipe.

1. Stop by a Japanese grocery store. Any Japanese grocery store will do, since even the tiny Nakayama Market in Pleasanton carries saba and daikon.

2. Purchase saba and daikon (that big white root vegetable). Also purchase a lemon or a lime if you don't have one handy at home.

3. Grill saba. On my two layer fish roaster, it takes 10 min. Since the Doc is a grill-meister, he can probably do this without the aid of an electric griddle...

4. Peel and grate daikon. This may be the only step difficult for a non-Japanese person. One has to purchase a daikon grater, which one can also pick up at a Japanese grocery store for $5-$10.

5. Serve saba with grated daikon, quartered citrus, and soy sauce.

saba2
I usually make a side of greens and white rice to go with this, but really, that's all there is. From start to finish, it never takes more than 20 min, and it's oh-so-yummy every time. Saba is full of that fishy oil that is supposed to be good for your eyes and mental cognition, not to mention the dance of umami amino acids on your tongue!!! This is really the working girl's gourmet meal that looks and tastes gourmet - feels like a meal at the local Japanese restaurant in the comfort of your own home.

Enjoy, Doc!